Staging Changes with Git Add
Learn how to move changes into Git's staging area and prepare them for your next commit.
Introduction
Git does not automatically save every file change into project history. Before a change becomes part of a commit, it must first be selected and prepared. This preparation step is called staging.
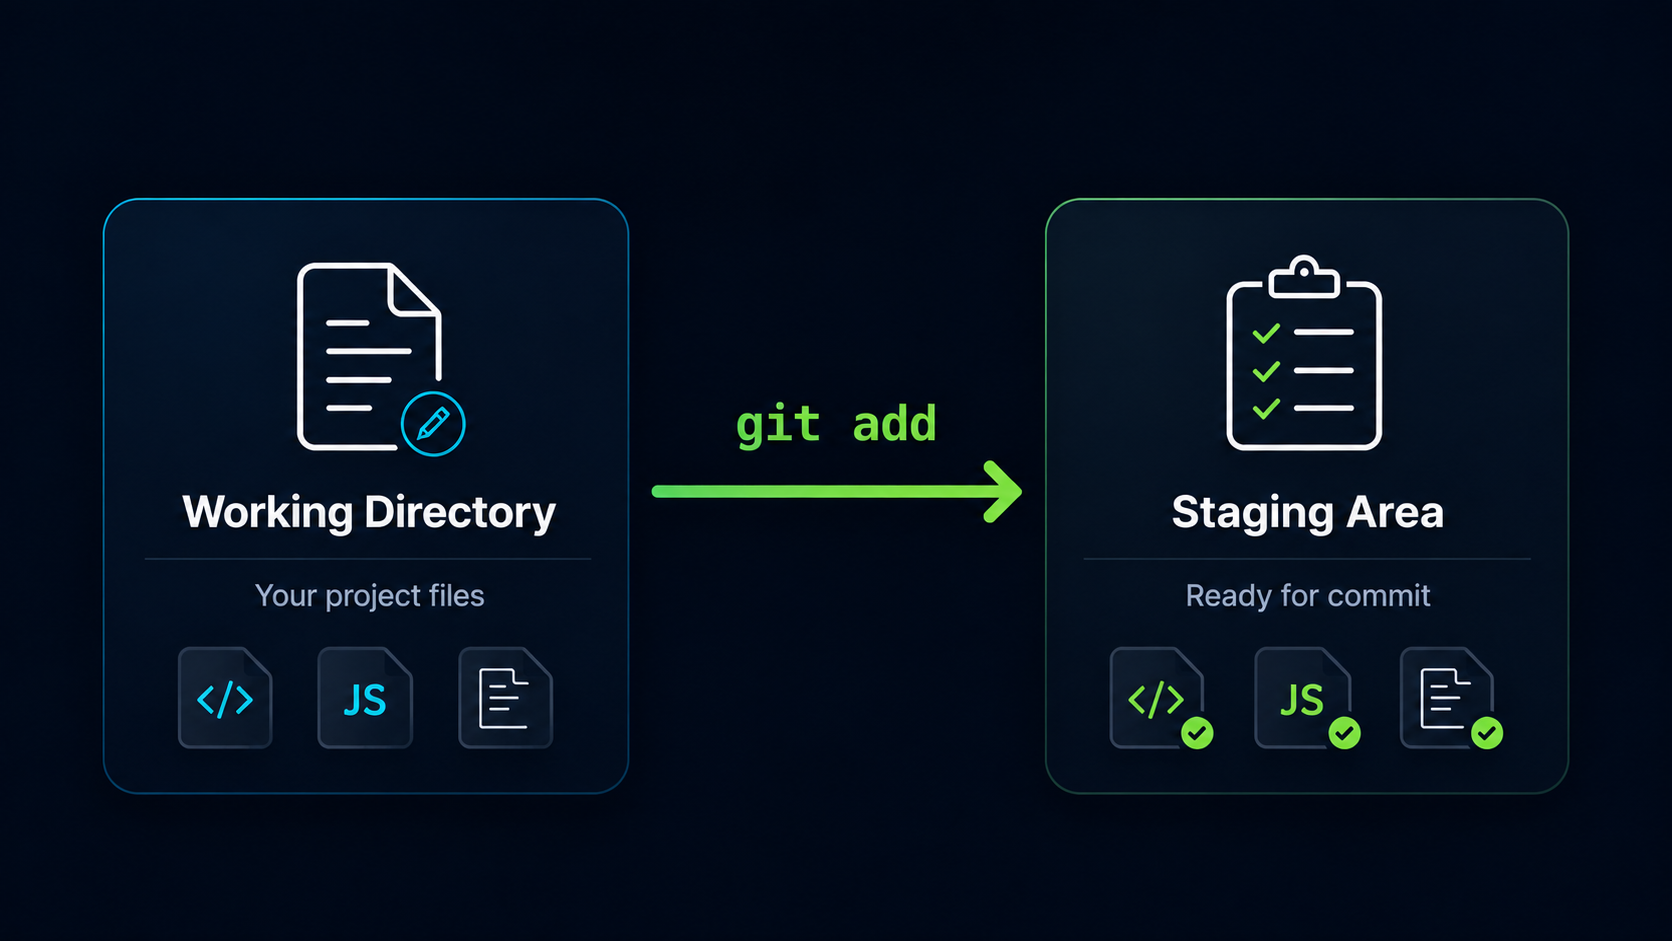
The git add command moves changes from your working directory into the staging area. Understanding this step is essential because it gives you control over exactly what will be included in your next commit.
Why Staging Matters
In real projects, you may edit several files at the same time. Some changes may belong together, while others may be unrelated experiments, notes, or unfinished work.
The staging area lets you organize your work before saving it into history. Instead of committing everything at once, you can choose only the changes that belong in the next commit.
Real World Example
Imagine fixing a navigation bug while also experimenting with a new homepage design. The bug fix is ready, but the homepage experiment is not. Git allows you to stage only the bug fix and commit it separately.
Git Add In The Workflow
The git add command moves changes from the Working Directory into the Staging Area.
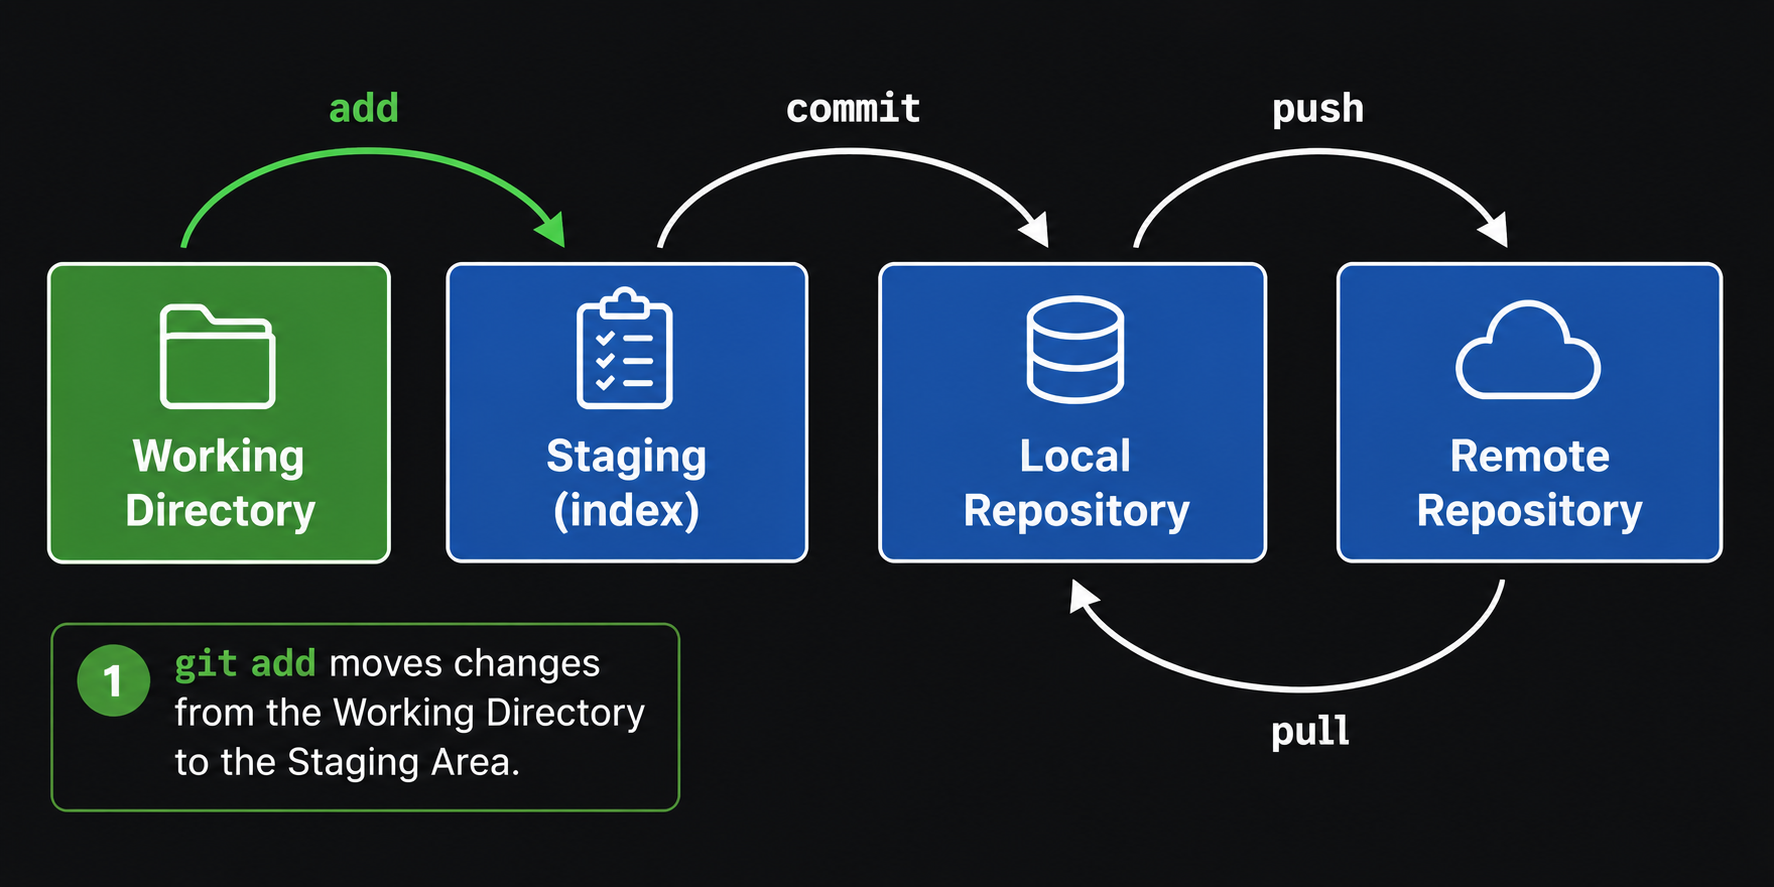
| Area | Meaning |
|---|---|
| Working Directory | Files you are currently editing |
| Staging Area | Changes selected for the next commit |
| Local Repository | Saved commit history on your computer |
Staging does not create a commit. It only prepares changes so they can be committed later.
Create A Change To Stage
To understand staging, it helps to create a simple file change and watch how Git sees it.
Open Git Bash In Your Repository
Open Git Bash and move into your project repository folder.
Use the same repository folder you created earlier, or any Git repository on your computer.
cd ~/my-first-project[user@computer MINGW64 ~]
$ cd ~/my-first-project
[user@computer MINGW64 ~/my-first-project (main)]
$
Add Text To The README File
Add a simple line of text to README.md.
This creates a real file change that Git can detect.
echo "This is my first Git project." >> README.md[user@computer MINGW64 ~/my-first-project (main)]
$ echo "This is my first Git project." >> README.md
Check The Current Status
Before staging the file, check what Git currently sees.
Run Git Status
Use git status to inspect the repository.
This shows whether the change is staged, unstaged, or untracked.
git status[user@computer MINGW64 ~/my-first-project (main)]
$ git status
On branch main
Changes not staged for commit:
modified: README.md
no changes added to commit
Git sees that README.md was modified, but the change is not staged yet. This means the file is still only in the Working Directory.
Stage A Single File
To prepare the README.md change for the next commit, use git add followed by the file name.
Stage README.md
Run git add with the README.md file name.
This moves the README.md change into the Staging Area.
git add README.md[user@computer MINGW64 ~/my-first-project (main)]
$ git add README.md
Git usually does not display a success message after git add. If no error appears, the command worked.
Check Status Again
Run git status again to confirm that the file is staged.
The file should now appear under changes to be committed.
git status[user@computer MINGW64 ~/my-first-project (main)]
$ git status
On branch main
Changes to be committed:
modified: README.md
README.md is now staged. Git is telling you that this change is ready to be included in the next commit.
Stage Multiple Files
You can stage more than one file at the same time by listing multiple file names after git add.
Stage Multiple Specific Files
Run git add followed by each file you want to stage.
This is useful when several related files belong in the same commit.
git add README.md index.html style.css[user@computer MINGW64 ~/my-first-project (main)]
$ git add README.md index.html style.css
This command stages the listed files only. Other modified files remain unstaged.
Stage All Changes
Sometimes you may want to stage all current changes in the repository. Git provides a shortcut for that.
Stage Everything In The Current Folder
Run git add with a period.
The period means the current directory and its contents.
git add .[user@computer MINGW64 ~/my-first-project (main)]
$ git add .
What Git Add Does Not Do
A common beginner mistake is thinking that git add saves changes permanently. It does not.
| Command | What It Does |
|---|---|
| git add | Prepares changes for the next commit |
| git commit | Saves staged changes into project history |
| git status | Shows the current state of your files |
git add is a preparation command. The change is not permanently saved into Git history until you create a commit.
Think Before You Add
Before using git add, ask yourself whether the change belongs in the next commit. This habit helps keep your project history clean and meaningful.
Common Beginner Mistakes
| Mistake | Result | Better Habit |
|---|---|---|
| Thinking git add creates a commit | Changes are only staged | Use git commit after staging |
| Using git add . without checking | Extra files may be staged | Run git status first |
| Staging unrelated changes together | Commit history becomes harder to read | Stage related changes together |
| Forgetting to stage changes | Commit does not include them | Check changes to be committed |
Why This Step Matters
Staging is what gives Git precision. It lets you choose the exact changes that should become part of the next commit instead of saving everything automatically.
Once you understand git add, commits become much easier to understand because a commit simply saves what has already been staged.
Conclusion
In this guide, you learned how git add moves changes from the Working Directory into the Staging Area. You also learned how to stage one file, multiple files, or all changes, and why checking git status before committing is an important Git habit.