Connecting a Local Repository to GitHub
Learn how to connect your local repository to GitHub and establish a remote relationship between them.

Introduction
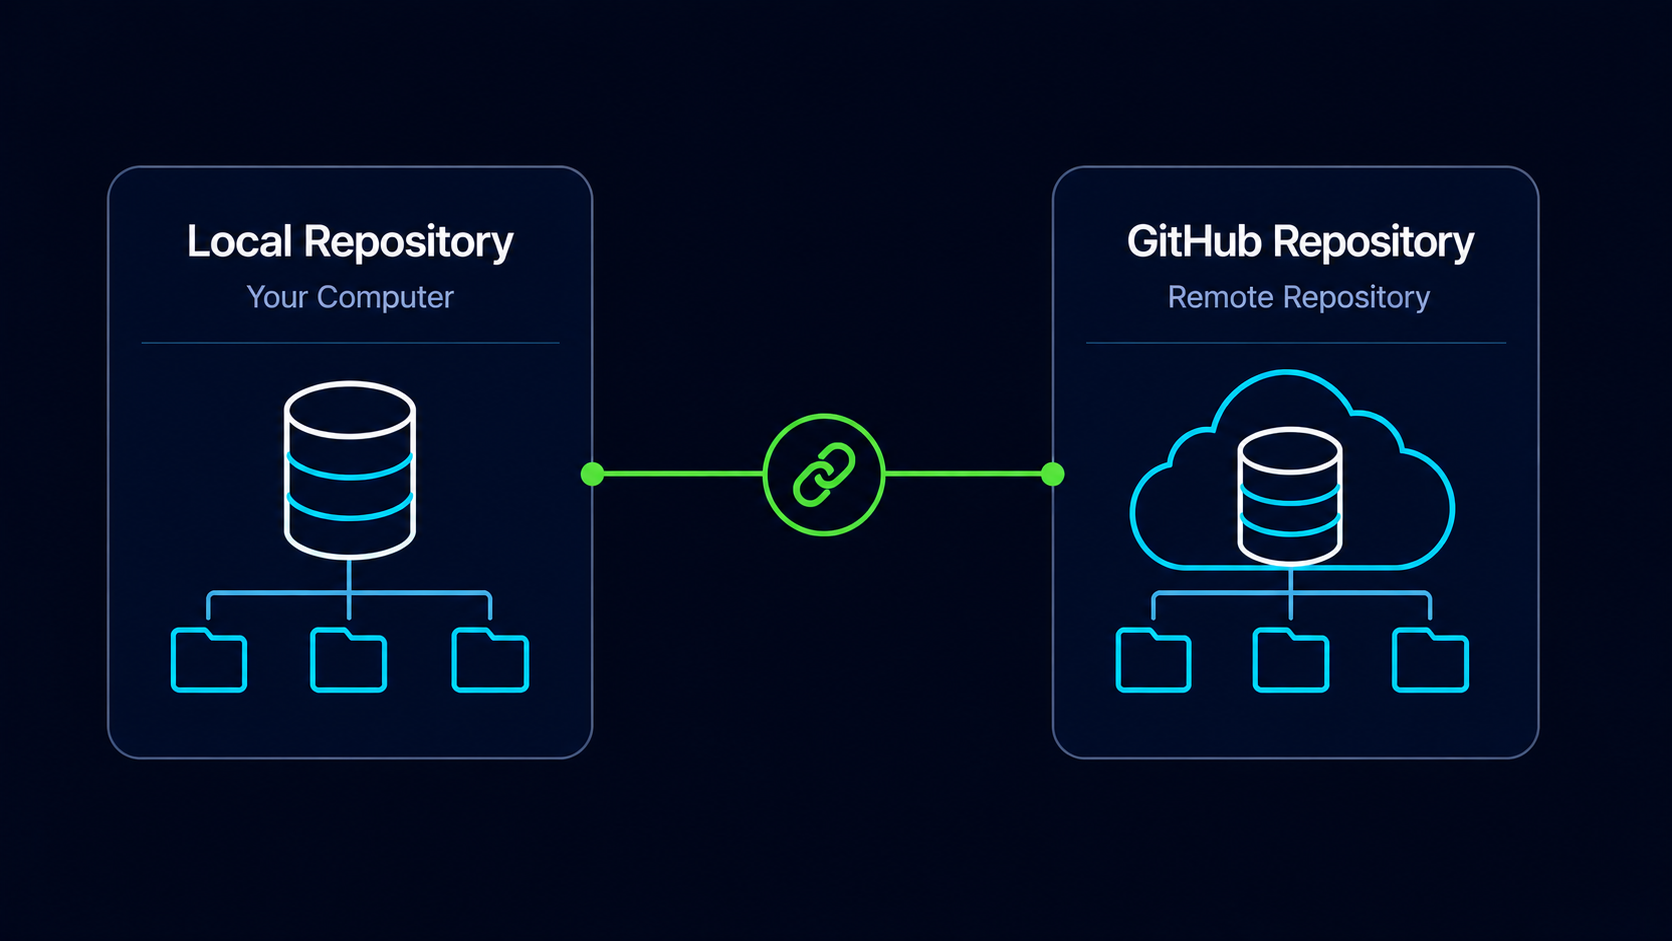
You now have two separate repositories. One exists on your computer and the other exists on GitHub. Although they may represent the same project, Git currently treats them as completely independent repositories.
Before Git can synchronize commits between your computer and GitHub, the two repositories must be connected.
In this guide, you'll learn how Git remotes work, how to connect a local repository to GitHub, and how to verify that the connection was created successfully.
Why Connecting Repositories Matters
Git cannot automatically know where your GitHub repository is located. You must explicitly tell Git which remote repository should be associated with your local project.
Once connected, Git can send commits to GitHub and retrieve changes from GitHub whenever needed.
Real World Example
Imagine your local repository is your laptop and GitHub is a secure cloud storage vault. Before files can move between them, you must establish a connection that tells both locations how to communicate.
Remote Repository Mental Model
Think of a remote repository as a destination that your local repository knows how to communicate with.
A remote is simply a saved connection between your local Git repository and another repository hosted elsewhere.
Simple Mental Model
A remote is a saved address that tells Git where your GitHub repository lives.
Locate Your Repository URL
Before creating the connection, you need the URL of your GitHub repository.
Open Your GitHub Repository
Navigate to the repository you created in the previous guide.
Open the repository's main page on GitHub.
View Repository Connection URL
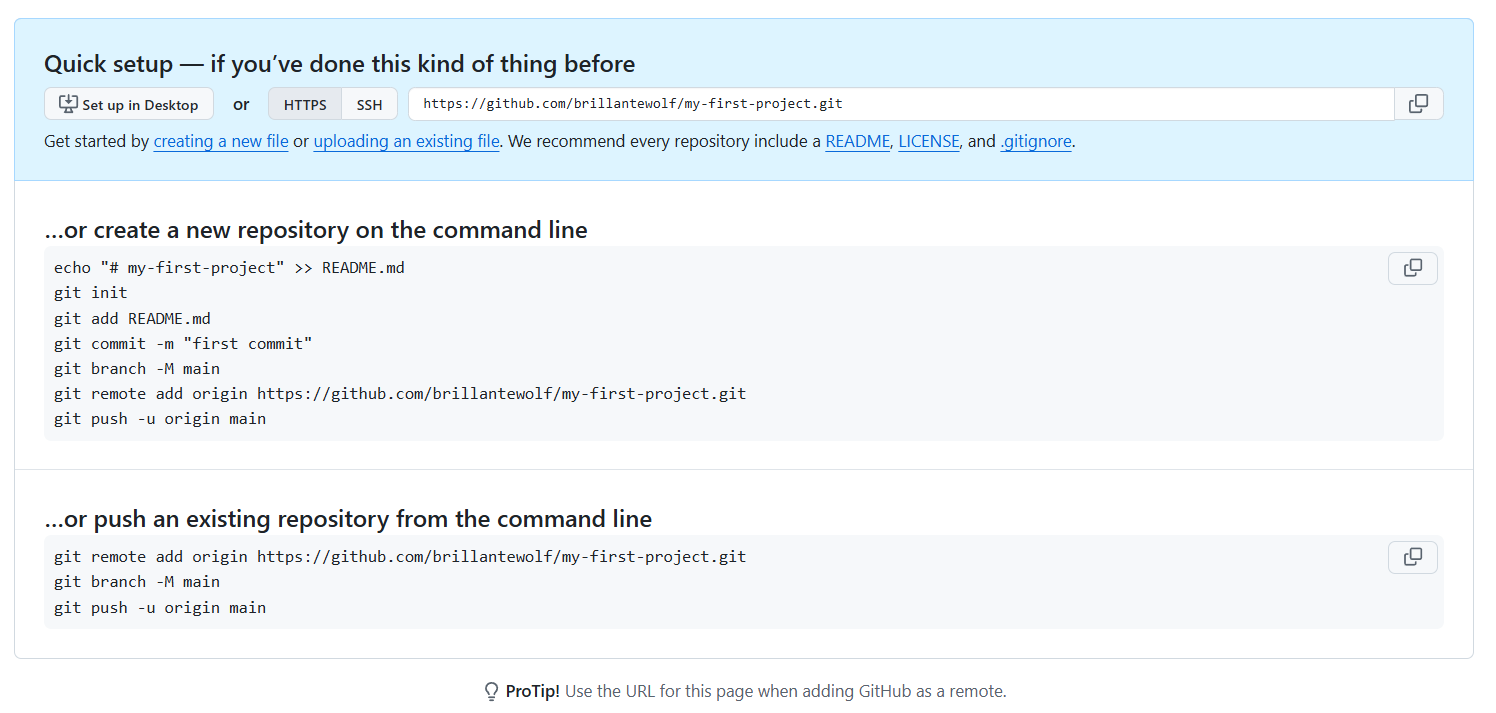
If the repository is empty, GitHub displays a Quick setup section that contains the repository URL.
If the repository already contains files, click the Code button to view available repository URLs.
Choose HTTPS and copy the repository URL.
Copy The HTTPS URL
Copy the repository URL shown in the HTTPS tab.
The URL should resemble your GitHub repository address.
Example Repository URL
https://github.com/username/my-first-project.git
Navigate To Your Local Repository
Open Git Bash
Open Git Bash and navigate to your local repository.
Use the repository you've been building throughout this learning path.
cd ~/my-first-project[user@computer MINGW64 ~]
$ cd ~/my-first-project
[user@computer MINGW64 ~/my-first-project (main)]
$
Create The Remote Connection
Git stores remote repository connections using names. By convention, the primary GitHub repository is usually named origin.
Add The GitHub Repository As A Remote
Use git remote add to create the connection.
Replace the example URL with your actual GitHub repository URL.
git remote add origin https://github.com/username/my-first-project.git[user@computer MINGW64 ~/my-first-project (main)]
$ git remote add origin https://github.com/username/my-first-project.git
[user@computer MINGW64 ~/my-first-project (main)]
$
Git typically produces no output when the command succeeds.
Verify The Remote Connection
After creating the remote, it's important to verify that Git saved the connection correctly.
View Configured Remotes
Run git remote -v to display all configured remote repositories.
The URL should match your GitHub repository.
git remote -v[user@computer MINGW64 ~/my-first-project (main)]
$ git remote -v
origin https://github.com/username/my-first-project.git (fetch)
origin https://github.com/username/my-first-project.git (push)
Git now knows where your GitHub repository is located.
| Entry | Purpose |
|---|---|
| fetch | Download changes from GitHub |
| push | Upload changes to GitHub |
Both operations use the same repository URL, but Git displays them separately because fetching and pushing are distinct actions.
Understanding Origin
The name origin is not special to Git. It is simply the conventional name developers use for the primary remote repository.
You could technically use another name, but origin is considered the standard and is used in most tutorials and professional workflows.
Common Remote Names
origin is the primary repository. Additional remotes may be added later for team workflows, forks, or backup repositories.
Common Beginner Mistakes
| Mistake | Why It Happens | Better Habit |
|---|---|---|
| Using the wrong repository URL | Copying the wrong address | Always verify the URL before adding the remote |
| Forgetting origin | Unfamiliar terminology | Remember origin is the standard remote name |
| Thinking add uploads files | Confusing connection with synchronization | Understand remote add only creates the relationship |
| Skipping verification | Assuming success | Run git remote -v after adding a remote |
Why This Step Matters
Connecting a local repository to GitHub is the bridge between local version control and cloud-based collaboration.
Without a remote connection, Git cannot exchange commits with GitHub. Every future push, pull, fetch, and synchronization operation depends on this relationship.
Conclusion
In this guide, you learned how to find your GitHub repository URL, add a remote connection using git remote add origin, and verify the connection using git remote -v.