Merging Branches
Learn how Git combines separate development timelines into a unified project history.
Introduction
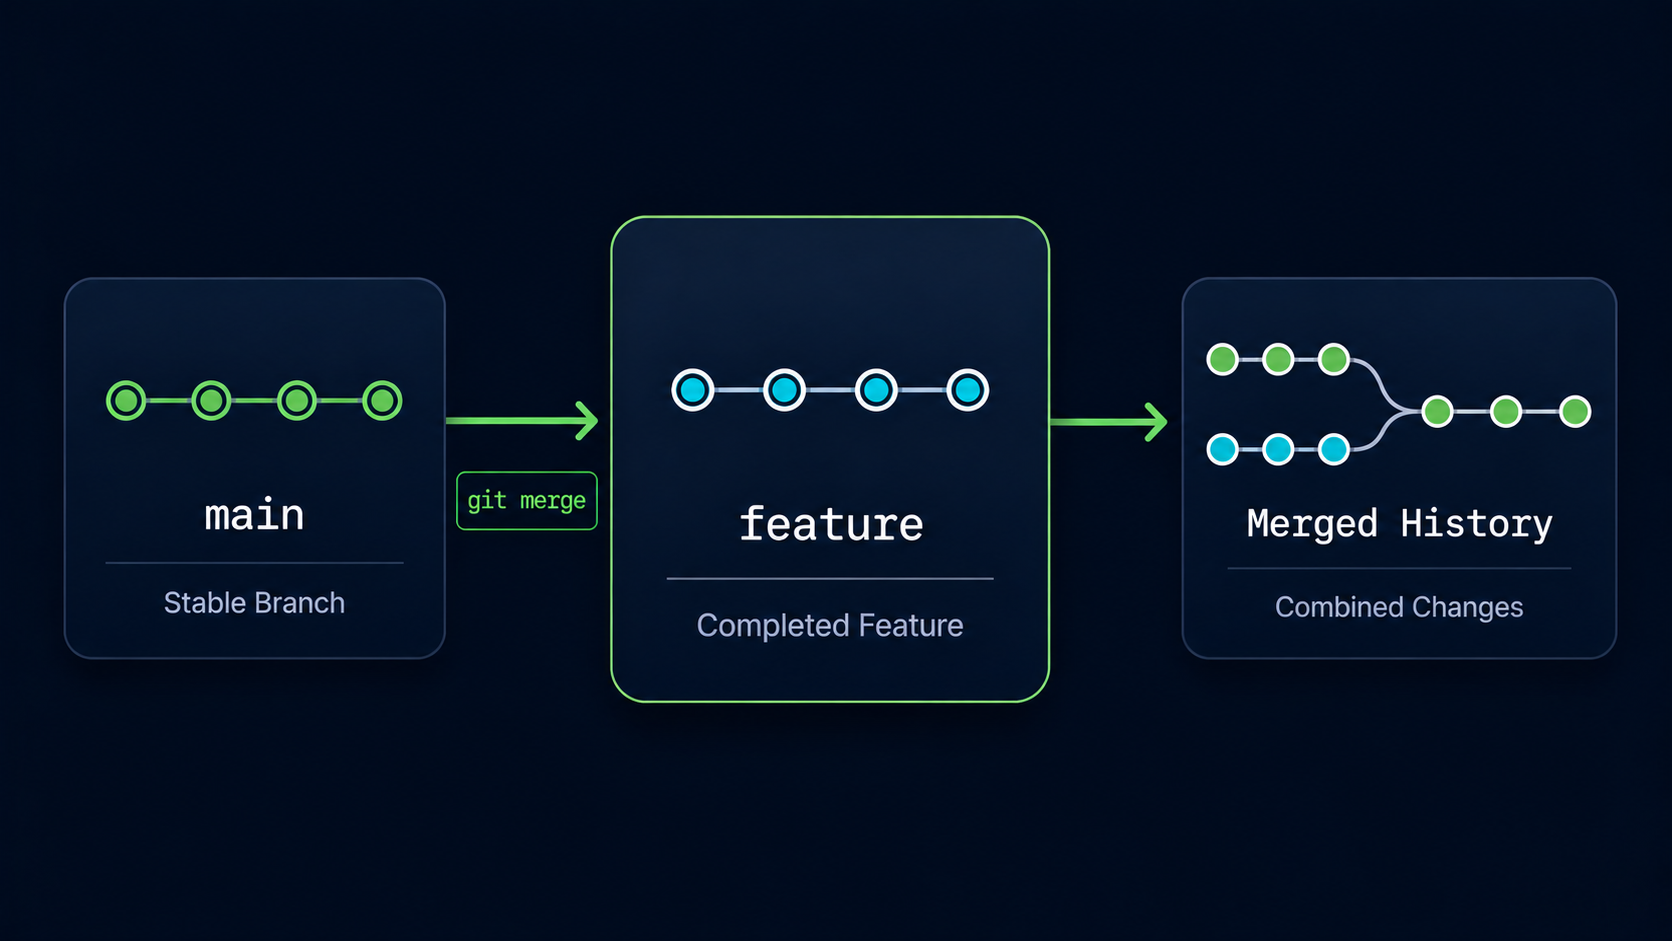
Branches allow developers to work independently on features, fixes, and experiments. Eventually, those changes need to become part of the main project. This process is called merging.
A merge combines the work from one branch into another branch. Most commonly, developers merge a feature branch into the main branch once the work is complete.
In this guide, you'll learn what merging is, why it exists, and how to merge branches using Git.
Why Merging Exists
Branches are useful because they isolate work. However, if changes remained isolated forever, they would never become part of the final project.
Merging allows Git to combine the changes made on separate branches into a single project history.
Real World Example
A developer creates a dark-mode branch and spends several days building a dark theme. Once the feature is complete, the branch is merged into main so the new feature becomes part of the primary project.
Branch Merging Mental Model
Think of branches as separate roads that eventually reconnect. Each road allows independent travel, but a merge combines both journeys into a single route.
After a successful merge, the destination branch contains the work from both timelines.
Simple Mental Model
Branches separate work. Merging brings that work back together.
View Available Branches
Before merging, it's helpful to see the branches that exist in the repository.
View Existing Branches
Open Git Bash and view the available branches.
The current branch is marked with an asterisk.
git branch[user@computer MINGW64 ~/my-first-project (dark-mode)]
$ git branch
* dark-mode
main
In this example, dark-mode contains work that we want to merge into main.
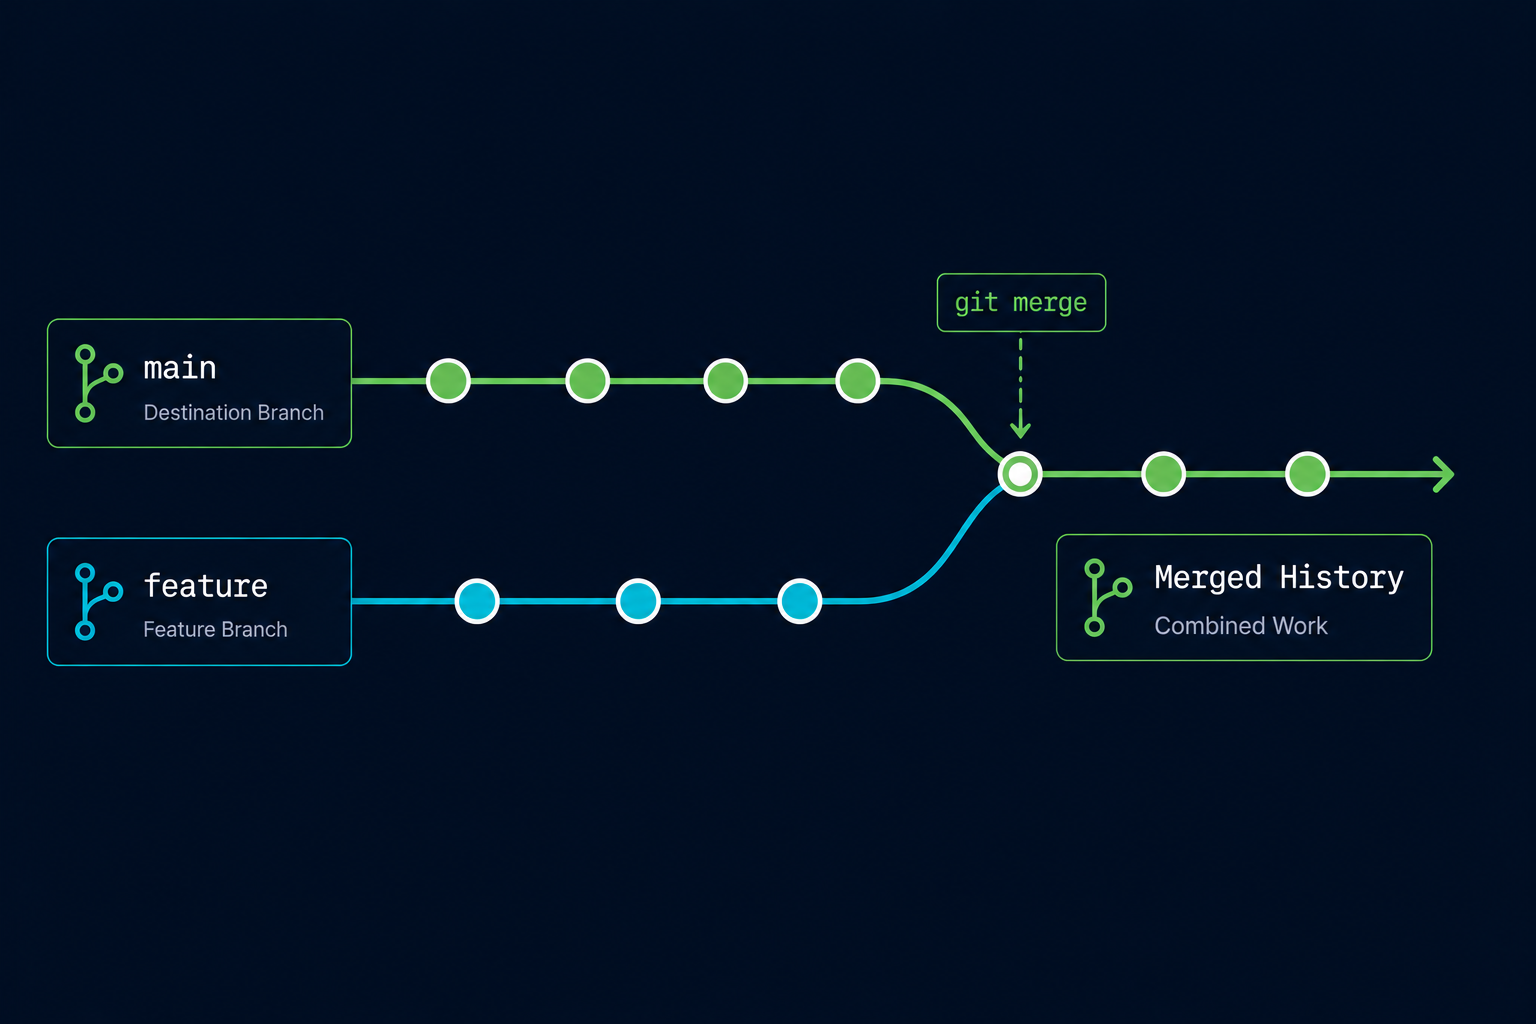
Switch To The Destination Branch
Git performs merges into the branch you are currently on. This means you must first switch to the branch that will receive the changes.
Switch To Main
Move to the main branch before performing the merge.
The merge will place the feature branch changes into main.
git switch main[user@computer MINGW64 ~/my-first-project (dark-mode)]
$ git switch main
Switched to branch 'main'
You are now standing on the branch that will receive the incoming changes.
Merge The Feature Branch
Use git merge followed by the branch name you want to bring into the current branch.
Merge The Dark Mode Branch
Merge the dark-mode branch into main.
Git will combine the changes from dark-mode into main.
git merge dark-mode[user@computer MINGW64 ~/my-first-project (main)]
$ git merge dark-mode
Updating 4a8f123..8bc9d45
Fast-forward
styles.css | 42 ++++++++++++++++++++++++++++++++++
1 file changed, 42 insertions(+)
Git successfully merged the branch into main. The dark-mode changes are now part of the primary project timeline.
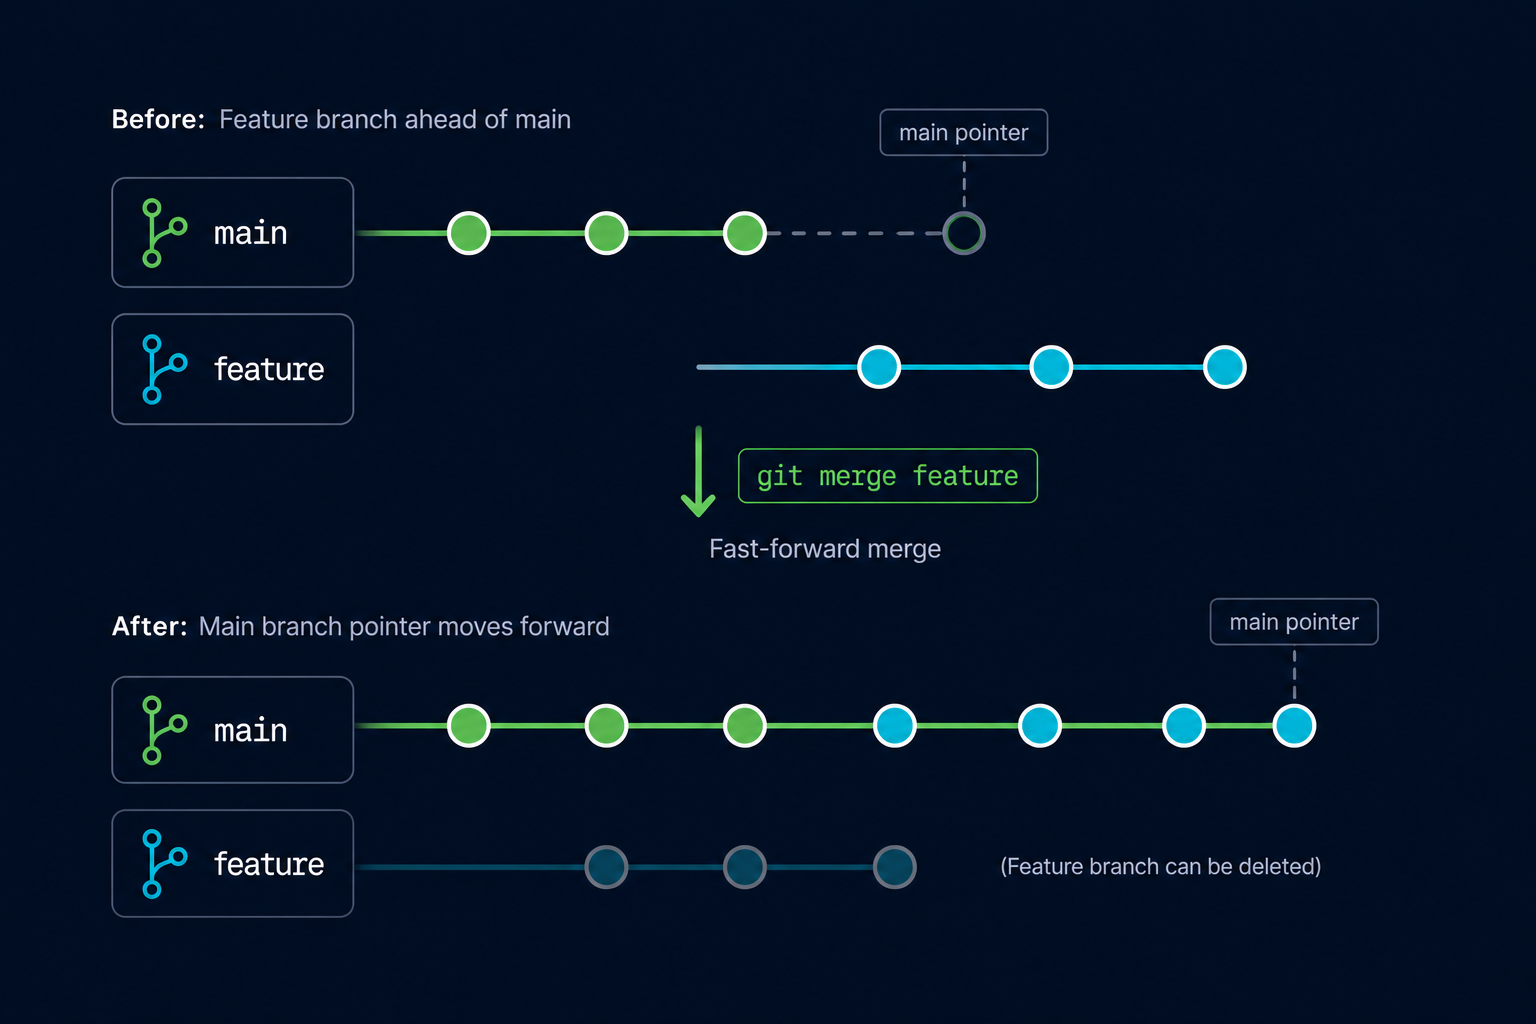
Understanding Fast-Forward Merges
In many beginner repositories, Git performs a fast-forward merge. This happens when the destination branch has not changed since the feature branch was created.
Instead of creating a special merge commit, Git simply moves the branch pointer forward to the newest commit.
Verify The Merge
After merging, you can inspect the commit history to confirm the changes were incorporated.
View Commit History
Check the repository history after the merge.
The merged branch commits should now appear in main.
git log --oneline[user@computer MINGW64 ~/my-first-project (main)]
$ git log --oneline
8bc9d45 Add dark mode styles
4a8f123 Add homepage
2e4f678 Initial project
The commit from the dark-mode branch now appears in the history of main.
What Happens To The Feature Branch
Merging does not automatically delete the source branch. The branch still exists even though its work has been incorporated into main.
| Action | Result |
|---|---|
| Merge branch | Changes become part of destination branch |
| Keep branch | Branch remains available |
| Delete branch | Optional cleanup step |
| Commit history | Preserved |
Many developers keep branches temporarily and delete them after confirming the merge was successful.
Common Beginner Mistakes
| Mistake | Why It Happens | Better Habit |
|---|---|---|
| Merging from the wrong branch | Confusing source and destination | Switch to the destination branch first |
| Forgetting to switch to main | Merge goes into wrong branch | Verify current branch before merging |
| Assuming merge deletes the branch | Misunderstanding Git behavior | Remember branches remain after merging |
| Fear of merging | Concern about breaking history | Practice merges in a test repository |
Why This Step Matters
Branches would have limited value without merging. Merging is the mechanism that allows isolated work to become part of the final project.
Modern software development relies heavily on branch-based workflows, making merging one of the most important Git skills to learn.
Looking Ahead
Most merges happen smoothly, but sometimes Git encounters conflicting changes that it cannot resolve automatically. In the next guide, you'll learn how merge conflicts occur and how to resolve them safely.
Conclusion
In this guide, you learned what merging is, why it exists, how to merge a branch using git merge, and how Git combines separate development timelines into a unified project history.