Creating Your First Commit
Create your first Git commit and learn how staged changes become permanent project history.
Introduction
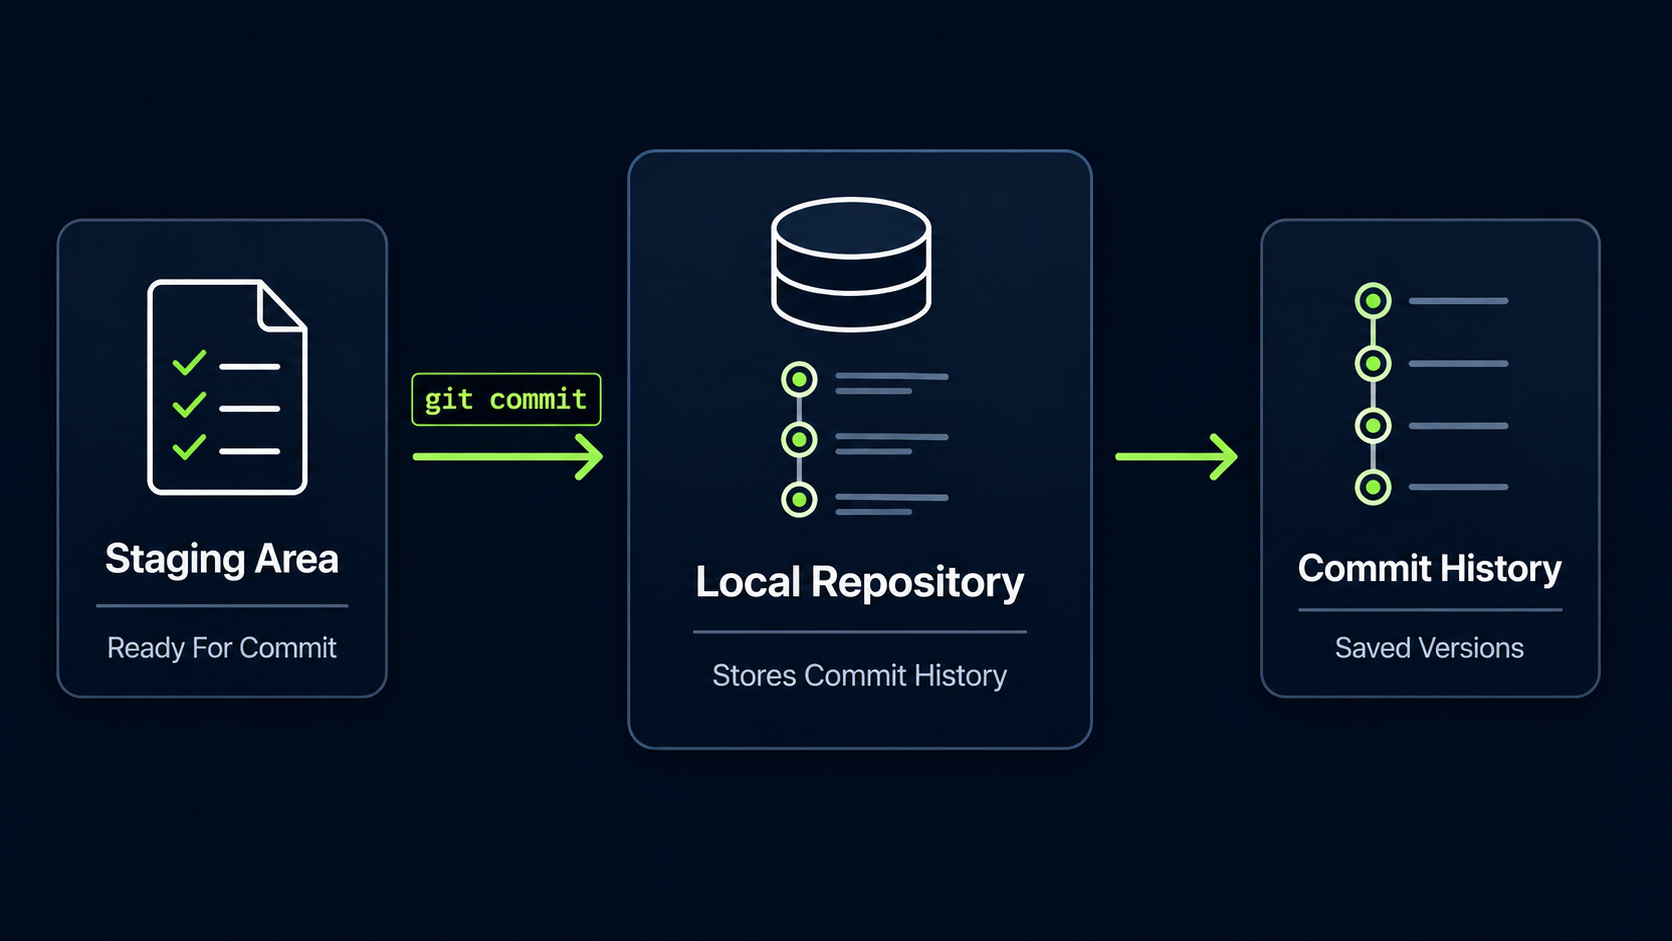
A commit is one of the most important ideas in Git. After you create or change files and stage them with git add, a commit saves those staged changes into your project's history.
In this guide, you will learn what a commit is, why commit messages matter, and how to create your first commit using Git Bash.
Why Commits Matter
Git does not save project history automatically. You decide when a meaningful checkpoint should be created. That checkpoint is called a commit.
A commit allows you to return to an earlier version of your project, understand what changed, and explain why the change was made.
Real World Example
Imagine you are building a website and you finish adding the homepage. Creating a commit at that moment gives you a clean checkpoint called Add homepage. Later, if something breaks, you can see exactly when that homepage work was saved.
Commit Mental Model
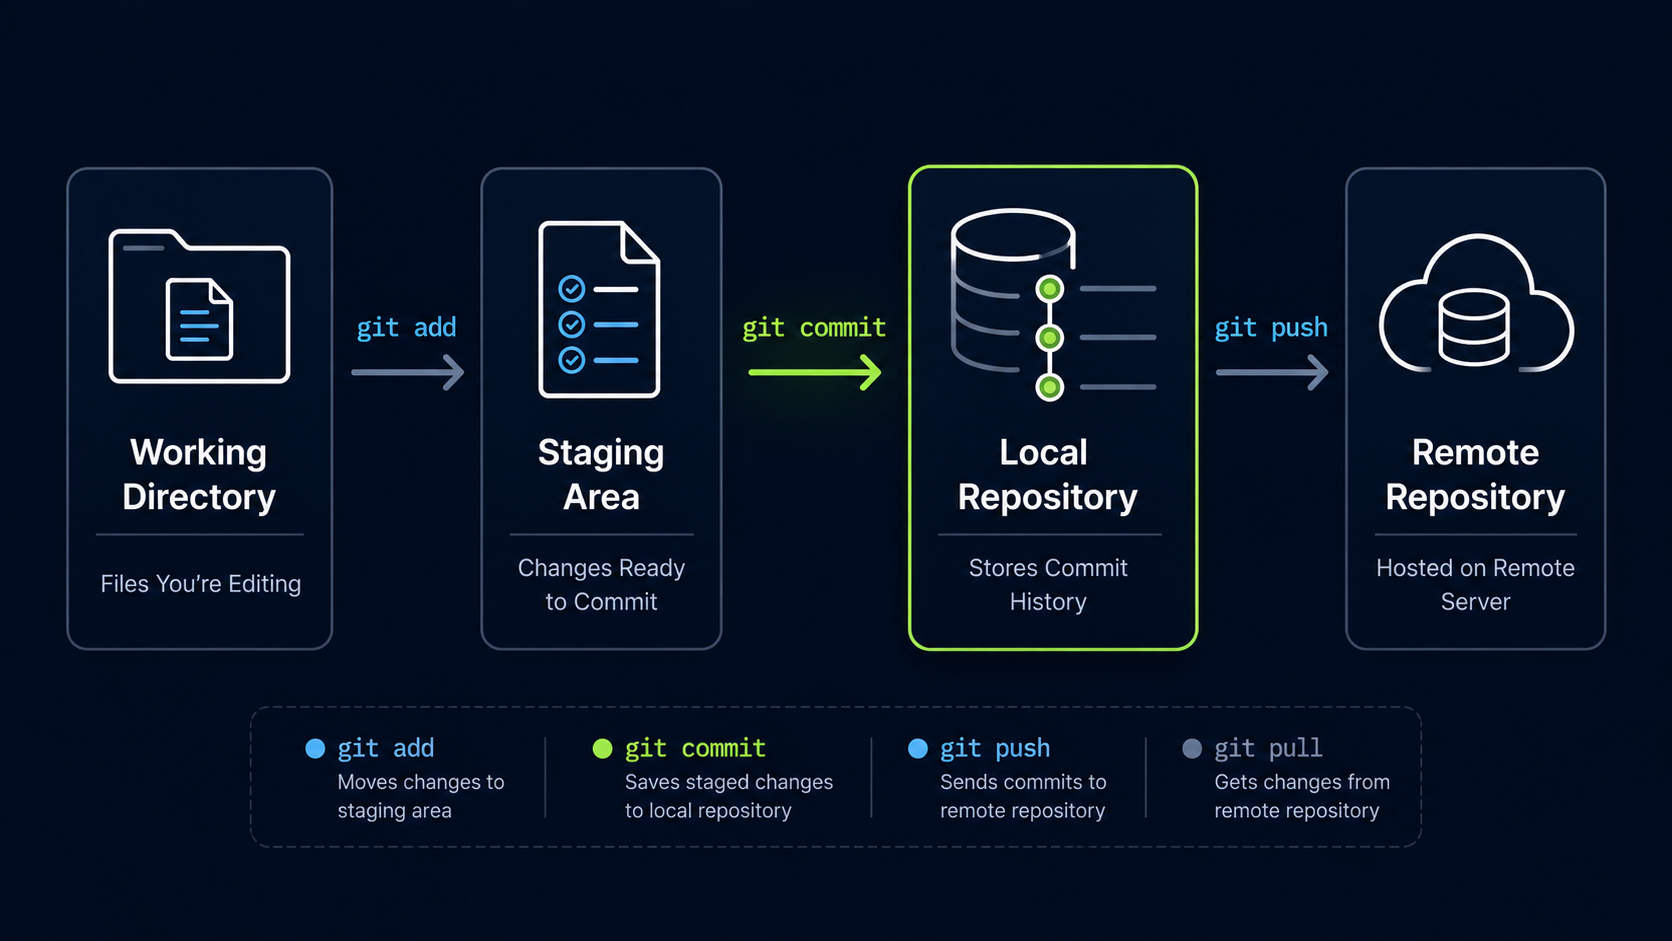
A useful way to think about a commit is as a snapshot of staged changes. The Working Directory is where you edit files. The Staging Area is where you prepare changes. A commit saves those prepared changes into history.
| Area | Meaning |
|---|---|
| Working Directory | Files you are editing |
| Staging Area | Changes selected for the next commit |
| Local Repository | Commit history stored on your computer |
The important detail is that git commit saves what is staged, not necessarily every file in your project.
Check What Is Ready To Commit
Before creating a commit, always check the repository status. This helps you confirm which changes are staged and ready to become part of history.
Open Git Bash In Your Repository
Open Git Bash and move into your project repository folder.
Use the same repository folder you created earlier, or any Git repository on your computer.
cd ~/my-first-project[user@computer MINGW64 ~]
$ cd ~/my-first-project
[user@computer MINGW64 ~/my-first-project (main)]
$
Check The Repository Status
Run git status to see what is staged.
Git will show whether there are changes ready to be committed.
git status[user@computer MINGW64 ~/my-first-project (main)]
$ git status
On branch main
Changes to be committed:
modified: README.md
This output means README.md is staged and ready to be included in the next commit.
Create Your First Commit
To create a commit, use git commit with the -m option. The -m option lets you write a short commit message directly in the command.
Commit The Staged Change
Create a commit with a clear message describing what changed.
Commit messages should be short, specific, and written in plain language.
git commit -m "Add README file"[user@computer MINGW64 ~/my-first-project (main)]
$ git commit -m "Add README file"
[main 3f4a2b1] Add README file
1 file changed, 1 insertion(+)
Git has now created a commit. The staged change has been saved into your local repository history.
Understand The Commit Output
Git gives you a short summary after creating a commit. This summary confirms that the commit was created and tells you what changed.
| Output Part | Meaning |
|---|---|
| main | The branch where the commit was created |
| 3f4a2b1 | Short commit ID |
| Add README file | Commit message |
| 1 file changed | Number of files included |
| 1 insertion(+) | Number of lines added |
The commit ID will be different on your computer. Git creates a unique identifier for each commit.
Verify That The Working Tree Is Clean
After creating a commit, check the status again. If all staged changes were committed, Git should report that there is nothing left to commit.
Check Status After The Commit
Run git status again.
This confirms whether your repository is clean after the commit.
git status[user@computer MINGW64 ~/my-first-project (main)]
$ git status
On branch main
nothing to commit, working tree clean
A clean working tree means Git does not see any uncommitted changes right now.
View Your Commit History
You can view your commit history with git log. This shows the commits that exist in your local repository.
View The Commit Log
Run git log with the --oneline option.
The --oneline option keeps the history compact and easier to read.
git log --oneline[user@computer MINGW64 ~/my-first-project (main)]
$ git log --oneline
3f4a2b1 Add README file
Your commit is now part of the repository history. As your project grows, this log becomes a timeline of your work.
Writing Better Commit Messages
A commit message should describe the change clearly enough that you can understand it later. Good commit messages make project history easier to read.
| Weak Message | Better Message |
|---|---|
| update | Add README file |
| changes | Fix navigation link |
| stuff | Create homepage layout |
| final | Add contact form validation |
A good beginner habit is to start commit messages with an action word such as Add, Fix, Create, Update, Remove, or Improve.
Commit Related Changes Together
A commit should usually represent one meaningful unit of work. Avoid mixing unrelated changes in the same commit.
Common Beginner Mistakes
| Mistake | Result | Better Habit |
|---|---|---|
| Running git commit before git add | Nothing gets committed | Stage changes first |
| Using vague messages | History becomes hard to understand | Write specific commit messages |
| Committing too many unrelated changes | History becomes confusing | Commit related work together |
| Forgetting git status | Uncertainty about what is staged | Check status before committing |
Why This Step Matters
Commits are the foundation of Git history. Every commit creates a checkpoint that helps you understand, restore, share, and review your work.
Once you understand commits, Git becomes much less mysterious. You are no longer just typing commands. You are intentionally building a timeline of your project.
Conclusion
In this guide, you created your first Git commit, verified that your working tree was clean, and viewed your commit history with git log. You also learned that commits save staged changes into project history and that clear commit messages make that history easier to understand.